
Hardscape Lighting Design in Southwest Ranches With CAD Plans
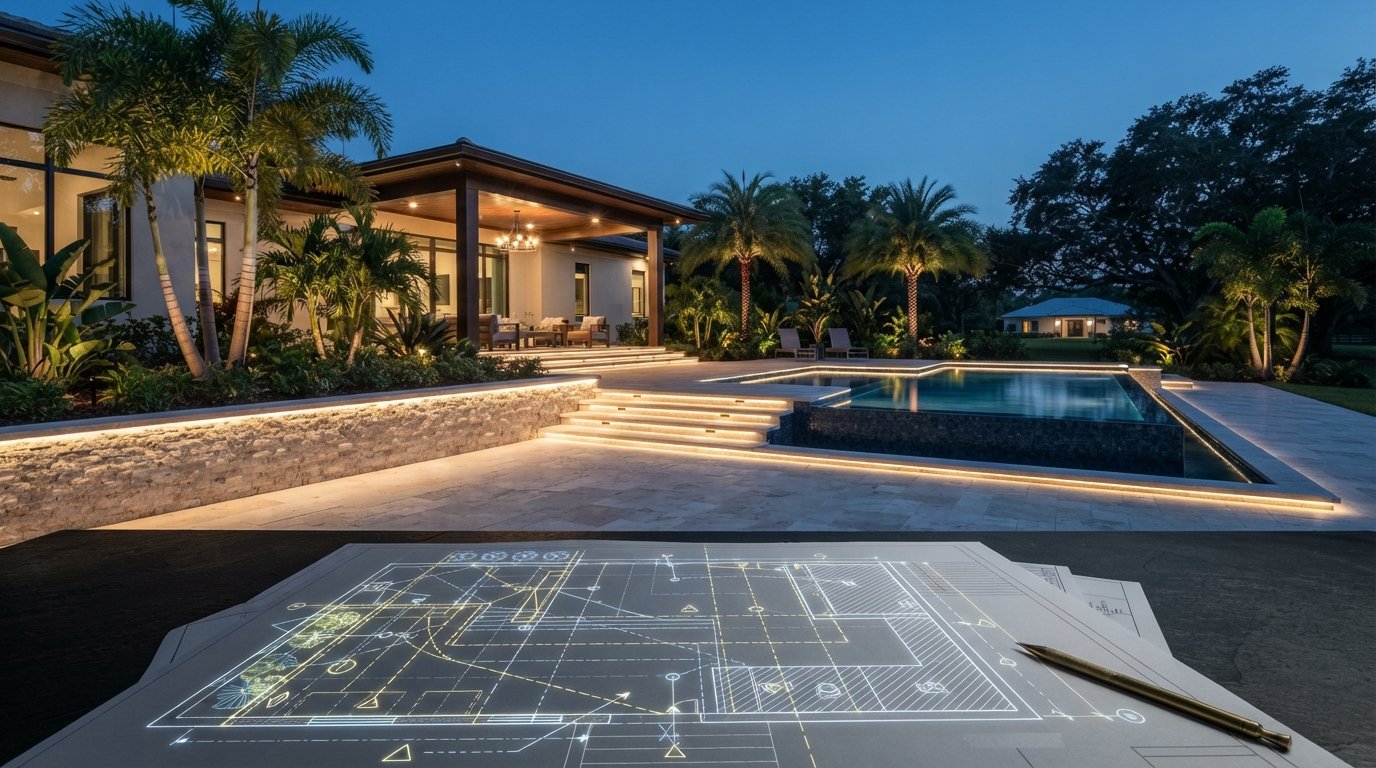
A well-planned hardscape lighting design in Southwest Ranches begins with CAD, not guesswork. A coordinated layout maps fixture positions and wiring routes, while electrical planning helps align the design with the space and installation needs. Fixture shielding and cut-off angles add up to 90 degrees, helping prevent direct views of the light source, according to the U.S. Environmental Protection Agency.
It’s natural to focus first on the atmosphere: a softly lit patio, a clear path after dark, or a pool area that feels inviting in the evening. But the most successful result also depends on practical decisions made before installation, including where light is needed, how fixtures relate to the hardscape, and how the electrical plan supports the design.
This guide explains what a CAD lighting layout can show, how electrical planning fits into the process, and what to consider when approvals apply. It also covers how fixture placement can highlight steps, edges, seating areas, and architectural details without letting the equipment dominate the view. The goal is a design that works on the plan and in the finished space.
Key Takeaways
- Use a CAD layout to map fixture locations and wiring routes before installation, making the design easier to coordinate with the hardscape.
- Plan electrical needs alongside the lighting concept so fixture placement and installation details work together.
- Review community guidelines early, since exterior-change approval depends on the rules that apply to your property.
- Choose fixture positions to define rooflines, steps, patios, retaining walls, and pavers without letting the hardware distract from the architecture.
- Match fixture style and placement to the surface and the purpose of each area, balancing useful illumination with a refined nighttime appearance.
Consultation, design approval, and installation process
A clear sequence turns an initial lighting idea into a coordinated installation plan. In Southwest Ranches, site measurements, fixture samples, approval requirements, and access conditions all shape the design.
Consultation and Design Approval
Begin with an on-site review of the patio, paths, retaining walls, and existing electrical access. A sample track and demo box can preview a lit roofline before permanent installation. The design review should identify fixture positions, wiring routes, and areas that may need approval. Look for a process that clearly explains the layout, electrical plan, installation, and nighttime adjustments.
Installation, Testing, and Adjustments
Installation follows the planned layout, with wiring routed to suit the hardscape and fixtures secured in position. Testing each light after dark makes glare, shadows, and uneven coverage easier to spot. Adjusting fixture direction can refine the effect across adjoining areas. For Florida’s humid climate, energy-efficient LED fixtures are a practical choice. Select outdoor-rated components suited to their location and exposure.
Homes with tile roofs and multiple tiers need careful planning for roofline attachment and access. A sample track and demo box can preview the effect, while the installation plan accounts for roof surfaces and elevated sections. This is distinct from placing lights in patios, steps, or pavers.
Wired low-voltage systems require planned wiring routes and support a connected design. Solar fixtures avoid those routes, but their performance depends on available sunlight. Project pricing depends on scope, wiring, surfaces, fixture choices, and access; request a project quote for your design.
Fixture Selection for Hardscape Features
Match each fixture to the surface and lighting purpose. Recessed or low-profile fixtures can define step edges, while wall-mounted options can wash a retaining wall without creating a glaring point of light. For pavers, plan fixture positions around joints and walking paths. On patios, account for seating and circulation when aiming beams and considering where shadows will fall.
For hardscape lighting, choose a warm or neutral color appearance that complements nearby materials, then set brightness for visibility without harsh glare. Shielding and cut-off angles add up to 90 degrees, helping prevent direct views of the light source, according to the U.S. Environmental Protection Agency.
Maintenance starts with clear fixture lenses and secure fittings after exposure to the weather. In Southwest Ranches, inspect lights after heavy rain or landscaping work, and clear debris that blocks a beam or collects around a fixture. A nighttime review can reveal misalignment or dimming before it affects the overall design.
CAD lighting layouts and electrical planning
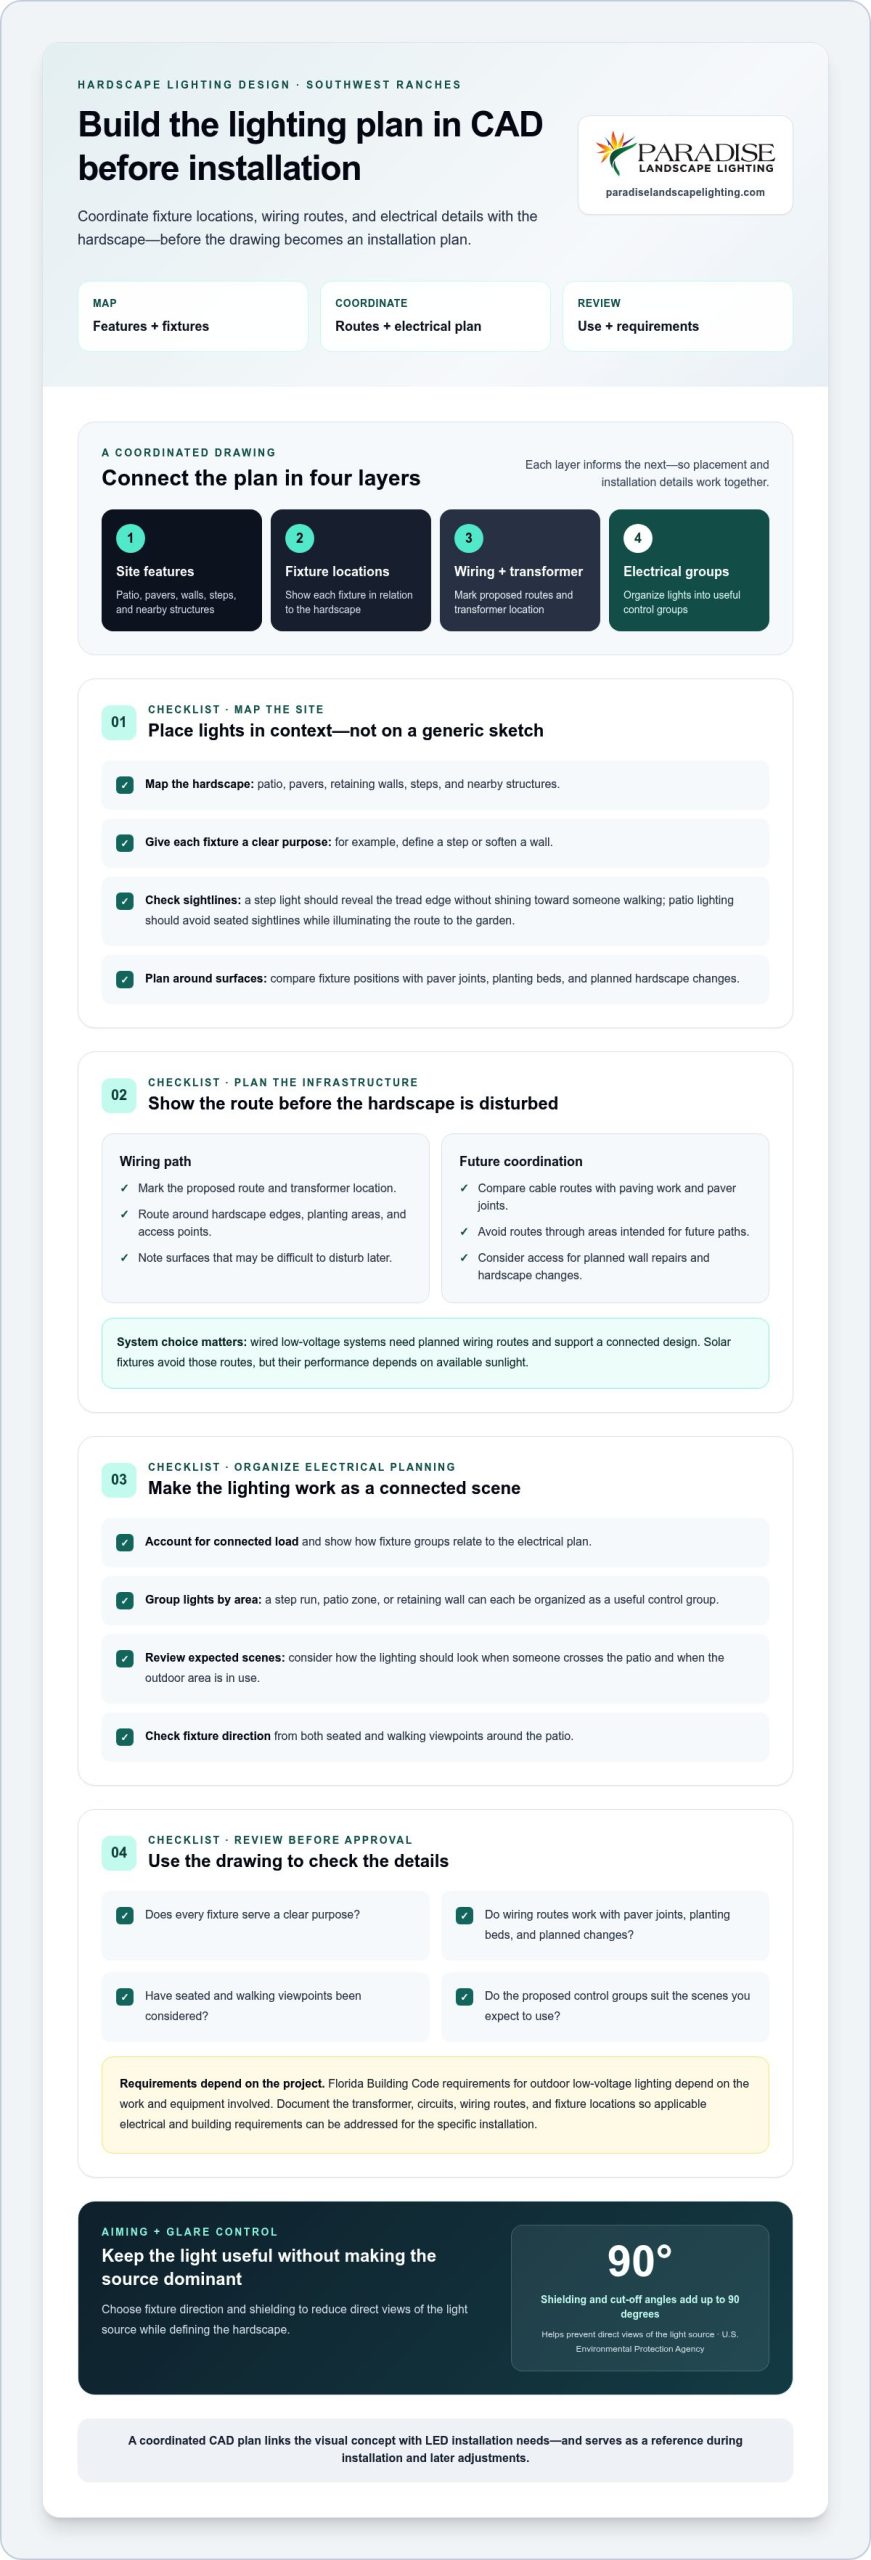
A CAD plan turns a lighting concept into a coordinated property drawing. For hardscape lighting design in Southwest Ranches, it can align fixture positions with the features and wiring routes already on site.
Start by mapping the patio, pavers, retaining walls, steps, and nearby structures. Show each proposed fixture in relation to those features, rather than relying on a general sketch. A step light, for example, should reveal the tread edge without shining toward someone walking. A patio fixture may need to avoid seated sightlines while lighting the route to the garden.
Next, mark the proposed wiring path and transformer location. Plan routes around hardscape edges, planting areas, access points, and surfaces that may be difficult to disturb later. A drawing that shows fixtures and wiring helps coordinate installation with paving work and avoid routing cables through areas intended for future paths or wall repairs.
Electrical planning accounts for connected load and fixture groups. The layout can identify lights for a step run, patio zone, or retaining wall, then organize them into useful control groups. Consider how the scene should look when someone crosses the patio and when the outdoor area is in use.
Florida Building Code requirements for outdoor low-voltage lighting depend on the work and equipment involved. A hardscape lighting design in Southwest Ranches should document the transformer, circuits, wiring routes, and fixture locations so applicable electrical and building requirements can be addressed for the specific installation.
Use the drawing to review practical details before approving the layout:
- Check that each fixture serves a clear purpose, such as defining a step or softening a wall.
- Compare wiring routes with paver joints, planting beds, and planned hardscape changes.
- Review fixture direction from seated and walking viewpoints around the patio.
- Confirm the proposed control groups suit the scenes you expect to use.
A coordinated plan connects the visual concept with LED installation needs. If a patio, walkway, and architectural features should read as one composition, a coordinated outdoor lighting design can bring fixture placement and electrical planning together. The drawing then serves as a practical reference during installation and later adjustments.
HOA and architectural review considerations
For Southwest Ranches homeowners, community guidelines determine whether permanent exterior lighting needs approval. Permit requirements are separate and depend on the project scope, including whether electrical or construction work requires review.
Southwest Ranches has fewer high-density HOA restrictions than many Broward neighborhoods, but property rules still vary. Some gated communities and deed-restricted streets review exterior changes. Identify the rules that apply to your home, then shape the lighting proposal to meet them.
A useful submission makes the proposed change easy to understand. Include a site plan or CAD layout showing fixture locations, wiring routes, and illuminated areas. Add fixture images or a sample, along with notes on placement and light direction. For example, show whether a wall fixture sits below a capstone or step lights are set into risers.
Separate visible design details from installation details. An architectural review may focus on fixture appearance, daytime visibility, and the effect of lighting on the home’s exterior. An electrical plan addresses wiring routes and equipment locations. Presenting both helps reviewers assess the design and installation approach separately.
Permit review is not the same as HOA approval. In Southwest Ranches and Broward County, permit needs depend on the electrical and construction work involved. A plan showing fixture positions raises different questions from one that includes new wiring or structural changes. Describe the proposed work clearly, rather than assuming community approval resolves permit requirements.
Before submitting, review the governing documents for terms such as exterior alteration, architectural review, and lighting. Then prepare a concise package with:
- A marked layout identifying each fixture and its purpose.
- Fixture appearance, mounting position, and direction of illumination.
- Wiring routes and any proposed changes to walls, paving, or structures.
- A brief explanation of how the design limits glare beyond the property.
For example, a proposal for recessed step lights can mark their positions along the stair run and show how they remain visually discreet. A wall-wash design can identify the illuminated surface and fixture locations. These details help reviewers assess the design instead of interpreting a broad description such as “patio lighting.”
Keep the approved layout with the project records. If installation changes fixture positions, wiring routes, or visible hardware, compare the revision with the approval before proceeding. This helps keep the finished exterior consistent with the reviewed plan.
Where a gated community or deed-restricted street reviews exterior changes, confirm the applicable submission process before treating the package as complete. Ask whether the reviewer needs any additional views or clarification about fixture visibility, light direction, or installation details. Keep the final proposal consistent across the layout, fixture information, and written explanation, so the reviewer can assess one clear design. If revisions are requested, update the relevant materials and describe what changed. This keeps the review focused on the proposed work and helps avoid confusion between community review and any separate permit questions.
Lighting placement on roof peaks, eaves, porticos, columns, and garages
Architectural lighting works best when fixture placement follows the home’s structure. In Southwest Ranches, roof peaks, eaves, porticos, columns, and garage fronts each create distinct lines to consider.
A low-profile track can follow rooflines and blend into the trim, keeping the hardware discreet in daylight. Plan its route around peaks, corners, and changes in roof height so the illuminated line appears continuous. For a home with several roof tiers, map each level before choosing attachment points. This helps the design relate to the full elevation rather than emphasize one roof edge.
Tile roofs and multiple tiers require careful planning for attachment and access. Identify how each section can be reached and where the track can follow the architecture without disrupting the roof’s appearance. A roofline sample can help homeowners preview the effect before permanent installation. Review upper and lower roof sections together so the lighting reads as one design.
At eaves, consider how the trim line frames the wall below. Consistent placement can emphasize the home’s proportions, while abrupt changes around corners may interrupt the visual flow. Porticos and columns benefit from lighting that highlights their shape without aiming a bright source toward the entrance. A fixture, for example, can reveal a column’s surface rather than shine outward toward visitors.
Garage lighting should relate to the rest of the façade. Aligning the illuminated edge with nearby eaves or a portico can create a more coherent appearance. Avoid treating the garage as a separate feature: compare its roofline, trim, and door position with the home’s main elevation before finalizing fixture locations.
To reduce glare and light trespass, aim fixtures toward architectural surfaces and keep the light source out of direct view from neighboring properties. Shielding, careful cutoff, and restrained brightness help confine illumination to the intended roofline, column, or entry area.
This approach focuses on the home’s structure, rather than ground fixtures or landscape beds. A roof peak or portico can establish a clear outline, while eaves and the garage carry the composition across the façade. Review the design from the street, front walk, and neighboring sightlines. Then adjust fixture direction and placement to emphasize the home without spilling light beyond the intended area.
A permanent lighting system can follow a home’s architectural lines with a low-profile track that blends into the trim. Keep the visual relationship consistent as the route passes between roof sections and details below. Where the façade changes direction or height, check that the track still supports the same architectural outline. At an entrance, lighting can connect the portico and columns with the adjoining roof edge, while the garage remains part of the broader composition. Make sure each area feels integrated rather than independently highlighted. A measured, continuous approach lets the home’s lines guide placement, with the track serving those forms instead of competing with them. Review the arrangement before installation so transitions across the façade remain intentional.
Which outdoor lighting fixtures work best for patios, retaining walls, steps, and pavers in South Florida?
The right fixture depends on the surface and purpose of the light. In Southwest Ranches, first decide whether the space needs route guidance, a softly illuminated wall, or usable patio lighting.
For patios, choose fixtures that illuminate activity areas without putting a bright source in seated sightlines. A shielded surface-mounted light can serve a defined seating edge, while a recessed fixture keeps a low profile near the patio border. Check the beam from standing and seated positions. A light that seems subtle from the walkway may feel harsh from a lounge chair.
Retaining walls call for a different approach. Wall-mounted fixtures can graze the surface and reveal its texture, while a light above the wall can spread illumination across a larger area. Compare the effects on the actual stone or masonry. Dark, rough material absorbs more light visually than a pale, smooth finish, so fixture direction matters as much as style.
For steps, choose a fixture that makes each tread edge easy to distinguish. Recessed step lights can sit in risers, while a nearby wall light can illuminate the stair run from the side. Avoid aiming a beam into someone’s eyes as they climb. Review the full flight to see whether shadows obscure any tread.
Pavers need careful coordination with joints and patterns. Before selecting an in-ground or surface fixture, mark proposed locations on the paving layout. Keep the arrangement consistent with the paver geometry, and avoid placing fixtures where furniture legs or regular foot traffic will obstruct them. A border light can define a patio edge without interrupting the central paving pattern.
South Florida’s humidity makes placement and upkeep important. Select outdoor fixtures suited to the exposure at each location, then keep lenses clear and check fittings for debris or movement. A fixture beside a planting bed may need more frequent cleaning than one beneath a covered patio. After installation, test the scene at night and adjust fixture direction to suit nearby walls, seating, and paths.
Use this quick selection guide during design:
- Patio: choose a shielded fixture for seating edges or gathering zones.
- Retaining wall: compare a surface wash with a grazing effect.
- Steps: illuminate tread edges while checking the view from both directions.
- Pavers: coordinate fixture positions with joints, borders, and walking routes.
For a cohesive plan across these surfaces, plan your hardscape lighting design around the materials, movement, and intended nighttime mood.
Paradise Landscape Lighting: Landscape Lighting Design
Paradise Landscape Lighting can turn a hardscape lighting concept into a coordinated outdoor design. Its lighting designer and lighting engineer create custom solutions for residential spaces, planning fixture placement around the property’s architecture and outdoor features.
Turn to the team when you’re ready to connect a CAD layout with practical installation, or when a patio, pool deck, sculpture, or artwork needs a considered lighting approach. Landscape Lighting Design and LED Lighting Installation bring planning and execution together, with tailored placement to make each feature feel intentional rather than overlit.
For a project covering several outdoor areas, discuss how the design can balance atmosphere, visibility, and your home’s character. Contact Paradise Landscape Lighting to discuss your outdoor lighting project.
Shape the next phase of your outdoor space
Start by deciding how you want the space to feel after dark. A quiet patio retreat, a clearly defined path, and softly highlighted outdoor artwork each call for a different lighting emphasis. Choosing a priority gives the design a clear purpose before fixture details are finalized.
For hardscape lighting design in Southwest Ranches, Paradise Landscape Lighting can connect your vision with a tailored plan. Its Landscape Lighting Design and LED Lighting Installation services support a coordinated path from concept to finished lighting, while Sculpture and Artwork Lighting can bring a focal point into the evening scene.
Share which outdoor areas matter most and how you use them. That gives the design conversation a practical starting point, whether you’re refining one feature or shaping a more connected outdoor environment.
Contact Paradise Landscape Lighting to discuss your project, and take the next step toward an outdoor space that feels considered after sunset.
Frequently Asked Questions
What hardscape lighting design services are available in Southwest Ranches, Florida?
Paradise Landscape Lighting provides residential outdoor lighting design and LED installation in Southwest Ranches. A hardscape project can include pool deck, walkway and fence, architectural, fountain, sculpture and artwork, or color LED lighting. The team creates custom low-voltage LED designs for outdoor spaces. Its local service area also includes Fort Lauderdale, Weston, Wilton Manors, Palm Beach, Miami, Miami Beach, Coral Gables, Plantation, West Palm Beach, and Coconut Grove.
What are the best energy-efficient LED options for hardscape lighting in Florida’s humid climate?
Energy-efficient LED fixtures are a practical choice for Florida’s humid climate. Choose durable outdoor-rated components suited to their placement and exposure.
Return to News